
Painting kitchen countertops can be a transformative project that revitalizes your space without the hefty price tag of a full remodel. This guide outlines the essential steps and considerations involved in the process, ensuring that your newly painted countertops look stunning and endure daily use. In this article, you will discover how to paint kitchen countertops effectively, covering preparation, materials, application, and maintenance.
Introduction to Countertop Painting
Before diving into how to paint kitchen countertops, it’s crucial to assess the current condition of your countertops. Updating your kitchen doesn’t have to break the bank. One budget-friendly solution is painting your countertops. It’s a simple DIY move with big impact. This guide gives you all the steps to refresh those old surfaces. We’ll talk about cleaning, priming, painting, and sealing. Plus, we’ll cover maintenance tips and common concerns. Ready to transform your kitchen? Let’s dive in!
Preparing Your Countertops for Paint
Removing Caulk and Cleaning Surfaces
Before diving into how to paint kitchen countertops, it’s crucial to assess the current condition of your countertops. Start by taking off any caulk around your sink and counters. Clean these areas well to remove residue.
Patching Cracks and Imperfections
Next, inspect for any cracks or imperfections. Use wood filler or a similar product to patch these up.
Once your counters are clean and smooth, you’re ready to move on to selecting your paint. This step is crucial for a durable and attractive finish.
Choosing the Right Paint Kit for Your Countertops
Understanding how to paint kitchen countertops effectively also involves selecting the right materials. Selecting a countertop paint kit needn’t be overwhelming. Aim for quality, ease of use, and desired finish.
Key Factors to Consider
When choosing, consider the following:
- Kit’s compatibility with your countertop material.
- The finish you want: glossy, matte, or satin.
- Included tools and materials.
- Customer reviews can guide durability expectations.
Popular Kits on the Market
Options like Giani countertop paint kits come highly recommended. They are known for their variety of styles and ease of application.
Paint Types: The Basics
Countertop-specific paints often fare better than generic ones. Use paints designed for high traffic areas for best results.
DIY or Professional-Grade Kits
Decide if you prefer a DIY-focused kit or something more professional. DIY kits typically offer detailed instructions tailored for beginners.
Investing in high-quality tools ensures a smoother application process as you learn how to paint kitchen countertops. Make your choice based on research, and ensure the kit matches your kitchen’s needs and your DIY comfort level.
Step-by-Step Guide to Painting Countertops
Applying Primer and Base Coat
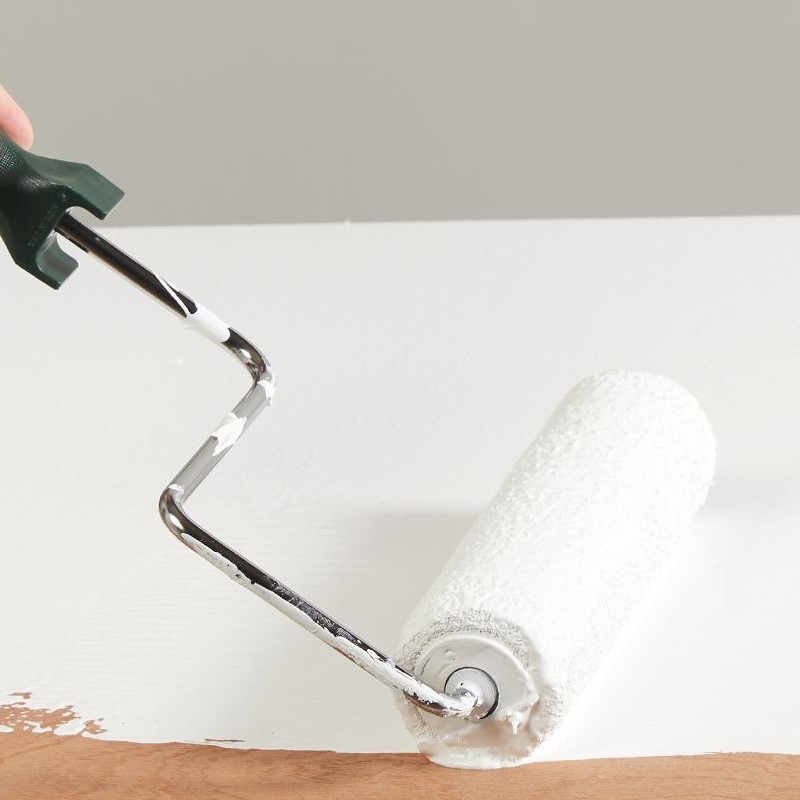
Start by applying a smooth, even primer layer to your clean countertops. Use brushes or rollers that come with your kit for this task. Once the primer dries, follow up with the base coat from your kit. For the best results, apply two thin layers and let them dry completely before moving on to the next steps.
Creating Veins and Patterns
To mimic natural stone, take a small artist’s brush and your chosen vein color. Draw thin lines across the base coat to create realistic veins. Look at pictures of marble for inspiration and vary the line weight and direction for a natural look. Use a light touch and don’t worry about making it perfect—veining is rarely uniform.
Adding Depth with Additional Paint Layers
Add depth and intricacy by sponging on additional paint layers. Take a sea sponge and lightly dab on different colors from your kit. Work in small sections to blend the colors while they’re still wet. Keep some of the base coat visible to create a varied, more authentic stone appearance.
Sealing and Finishing with a Protective Coating
Once you’re happy with your design, it’s time to seal and protect your work. Use the top coating provided in your countertop paint kit, applying a thin, even layer. Allow ample drying time as per the kit instructions. This last step ensures durability and sheen, locking in your hard work.
Painting Vertical Surfaces and Backsplashes
When it comes to painting countertops, you shouldn’t overlook vertical surfaces and backsplashes. These areas can make or break the finished look of your kitchen renovation. A cohesive design ties the entire space together, making your efforts worthwhile. Here’s how to tackle vertical painting.
Step-by-Step Instructions for Vertical Painting
- Clean the Surface: Just like your countertops, ensure the backsplash is free of dust, grease, and old caulk. Use a degreaser and let it dry completely.
- Apply Primer: Use a small roller or angled brush for corners and edges. Cover the surface evenly. Remember, thin coats prevent drips.
- Paint with Care: Apply your paint or kit’s content as you would on the horizontal surfaces. Keep a steady hand to avoid streaks.
- Attend to Details: Work on laid patterns or grains if your backsplash design calls for it. This calls for patience but pays off in aesthetics.
- Seal the Deal: Finish with a clear coat sealer. It’s as pivotal for vertical surfaces as it is for horizontal ones.
Tips for a Perfect Finish
- Take your time and don’t rush the process.
- Mask countertops and edges to protect against spills.
- Use sponges for a textured look or brushes for a smoother finish.
- Consider layers for visual depth. Play with light and dark tones.
Careful application results in a seamless transition from your countertops to your backsplash, creating a beautiful and unified kitchen space.
Tips for Maintaining Painted Countertops
Maintaining your freshly painted countertops ensures they stay looking great for years to come. Here’s how to keep them in top shape:
Use Gentle Cleaning Agents
Always clean with mild soapy water or a non-abrasive cleaner. Harsh chemicals can damage the paint finish.
Avoid Direct Heat
Never place hot pots directly on painted countertops. Use trivets or potholders to protect the surface.
No Cutting Directly on the Surface
Use cutting boards to prevent scratches. Cutting directly on the paint can lead to chips and peels.
Wipe Spills Promptly
Clean spills as soon as they happen to avoid stains and preserve the paint’s integrity.
Use Soft Cloths
For daily cleaning, use a soft cloth or sponge. Avoid abrasive tools that scratch the surface.
Protect From Heavy Objects
Don’t drop heavy objects on painted countertops. This can cause dents or chips in the paint.
Regular Touch-Ups
Inspect your countertops regularly. Touch up any chips or scrapes promptly to prevent further damage.
Watch Out for Stains
Some substances like wine or coffee can stain. Wipe up immediately to prevent permanent marks.
Limit Exposure to Sunlight
Prolonged exposure to UV light can fade paint colors. Use blinds or curtains to minimize sunlight.
Reapply Sealant
Over time, the sealant may wear down. Reapply as needed to maintain protection.
By following these simple tips, you can enjoy beautiful, painted countertops that last. Regular care makes all the difference in maintaining your kitchen’s aesthetic appeal.
Common Questions and Concerns Addressed
Durability and Longevity of Painted Countertops
Many homeowners are concerned about how long their painted countertops will last. High-quality paint kits, proper application, and sealing can ensure longevity. Regular maintenance and gentle use can extend the life of your painted surfaces for years.
Dealing with Chips and Repairs
It’s natural for countertops to experience wear and tear over time. For minor chips and scratches, most kits include touch-up solutions. Quick repairs can prevent further damage and keep countertops looking fresh.
Safe Cleaning Practices for Painted Surfaces
Harsh chemicals and abrasive sponges can damage painted countertops. Stick to mild soap and water for cleaning. Use soft cloths to preserve the paint’s finish.
Transform your outdated kitchen counters with confidence. Research, preparedness, and care will lead to a satisfying and cost-effective makeover.
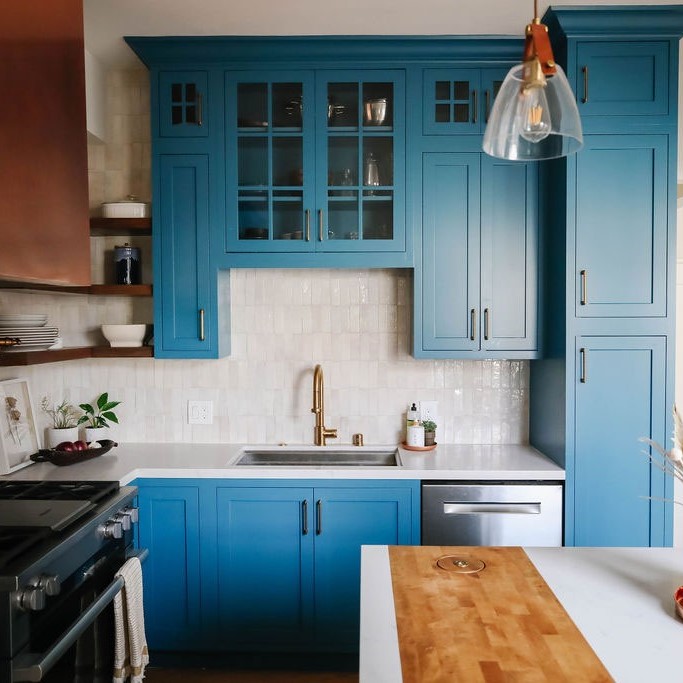
Before and After: Transforming Your Kitchen on a Budget

Revamping your kitchen doesn’t have to empty your wallet. Painting your countertops can lead to a stunning transformation without a hefty price tag. Let’s explore the remarkable changes you can achieve and how to get the best results on a budget.
Before starting, imagine the outcome. Envision bright, modern counters replacing the worn-out old ones. Gather inspiration and compare it with the current look of your kitchen. This will guide your paint selection and techniques to ensure the result aligns with your vision.
After proper prep, painting, and sealing, the difference is night and day. No longer are there dated, scratched surfaces; instead, your kitchen boasts sleek, refreshed countertops that look almost new. Showing off the ‘before’ alongside the ‘after’ will prove how impactful this simple DIY project can be.
Achieving this doesn’t require pro skills, just patience and following each step carefully. When budget constraints limit full-scale renovations, painting your kitchen countertops offers an affordable yet effective option.
Remember to maintain your newly painted counters. Use gentle cleaners, avoid chopping directly on them, and shield from heat. This ensures they remain in excellent condition as if they were just painted.
By addressing common concerns such as durability and repair, you can rest assured your low-cost renovation has staying power. And the pride you’ll feel in your DIY accomplishment will make your budget-friendly kitchen makeover all the more satisfying.


